This is a kind-of complimentary project to the aviary I built.
I wanted to strengthen the balcony and eliminate any flex in the wood for comfort (so it doesn’t feel like walking on an unstable surface). This could be easily achieved by adding one support beam between the 2 existing ones, which were spaced 16 ft apart.
At first, I wasn’t sure if this could get tricky, but after considering how to achieve it (dig a hole, add a concrete pier block, adjust the height, add a beam, secure everything) it became very clear and narrow in scope project. All in all this took under 2 hours in a warm weather (I took couple breaks to drink some water 😉 ).
Materials and cost
| Product | Quantity | Unit price | Total price | Link |
| Pier block (with hole for mount) | 1 | $9 | $9 | Home Depot |
| Pier block post base (adjustable) | 1 | $12 | $12 | Home Depot |
| Pressure treated post (4x6in, 8ft) | 2 | $22 | $44 | Home Depot |
| Galvanized nails, 3 inch, 1lb box | 1 | $5 | $5 | Home Depot |
| Pressure treated plank, 1x6in, 4ft | 1 | $5 | $5 | Home Depot |
| Simpson strong tie A23Z | 2 | $1 | $2 | Home Depot |
| Total | $77 |
Hint: you can buy a cheap piece from scrap wood section of your hardware store, or find a beam with clear defects, have them cut the short piece you need from it and then buy it at a significant discount because of the defect – it doesn’t matter to you, and store wants to sell it, so win-win 😉
Depending on how high your balcony/deck is, you may need to buy longer beam. I needed around 7 ft, thus I bough an 8 ft length. And I bought 2 of them, as I wanted to cut a 2 ft long piece and put it horizontally on top of the beam to allow for wider area of contact with the balcony.
Oh, and you’ll also need measuring tape, a hammer, and a saw to cut the beams to size (or measure ahead and have them cut in store).
Installation
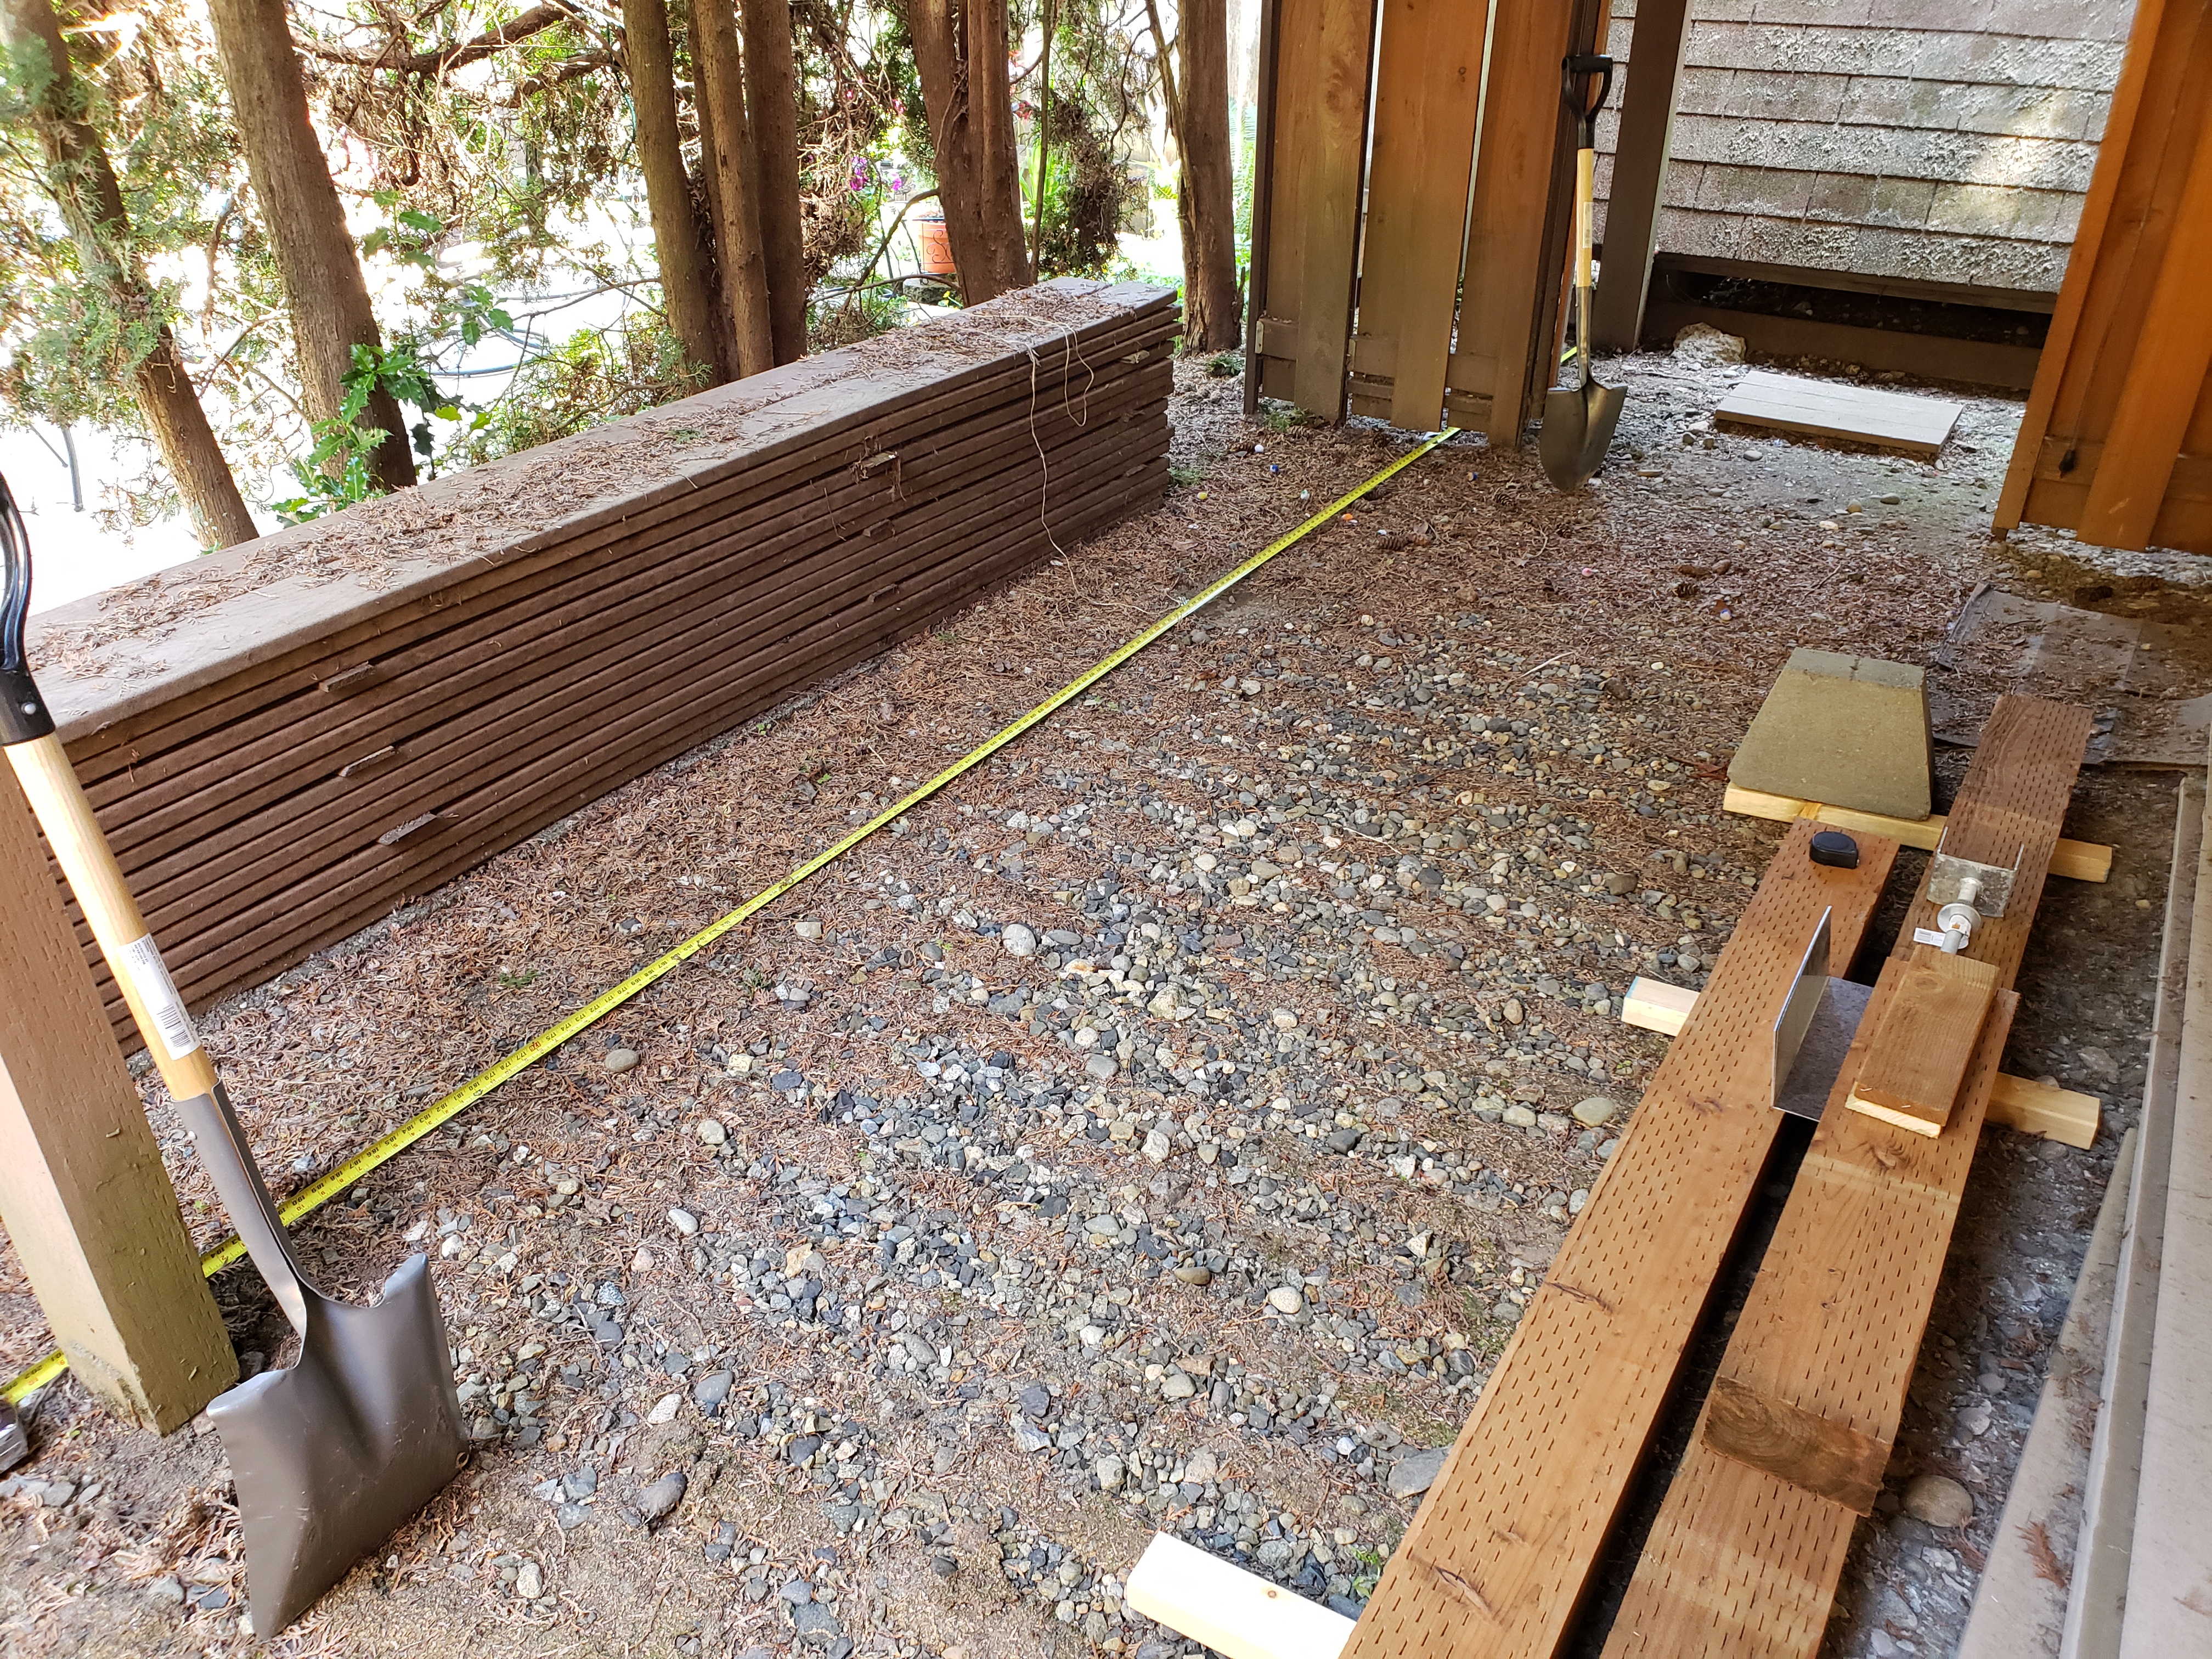
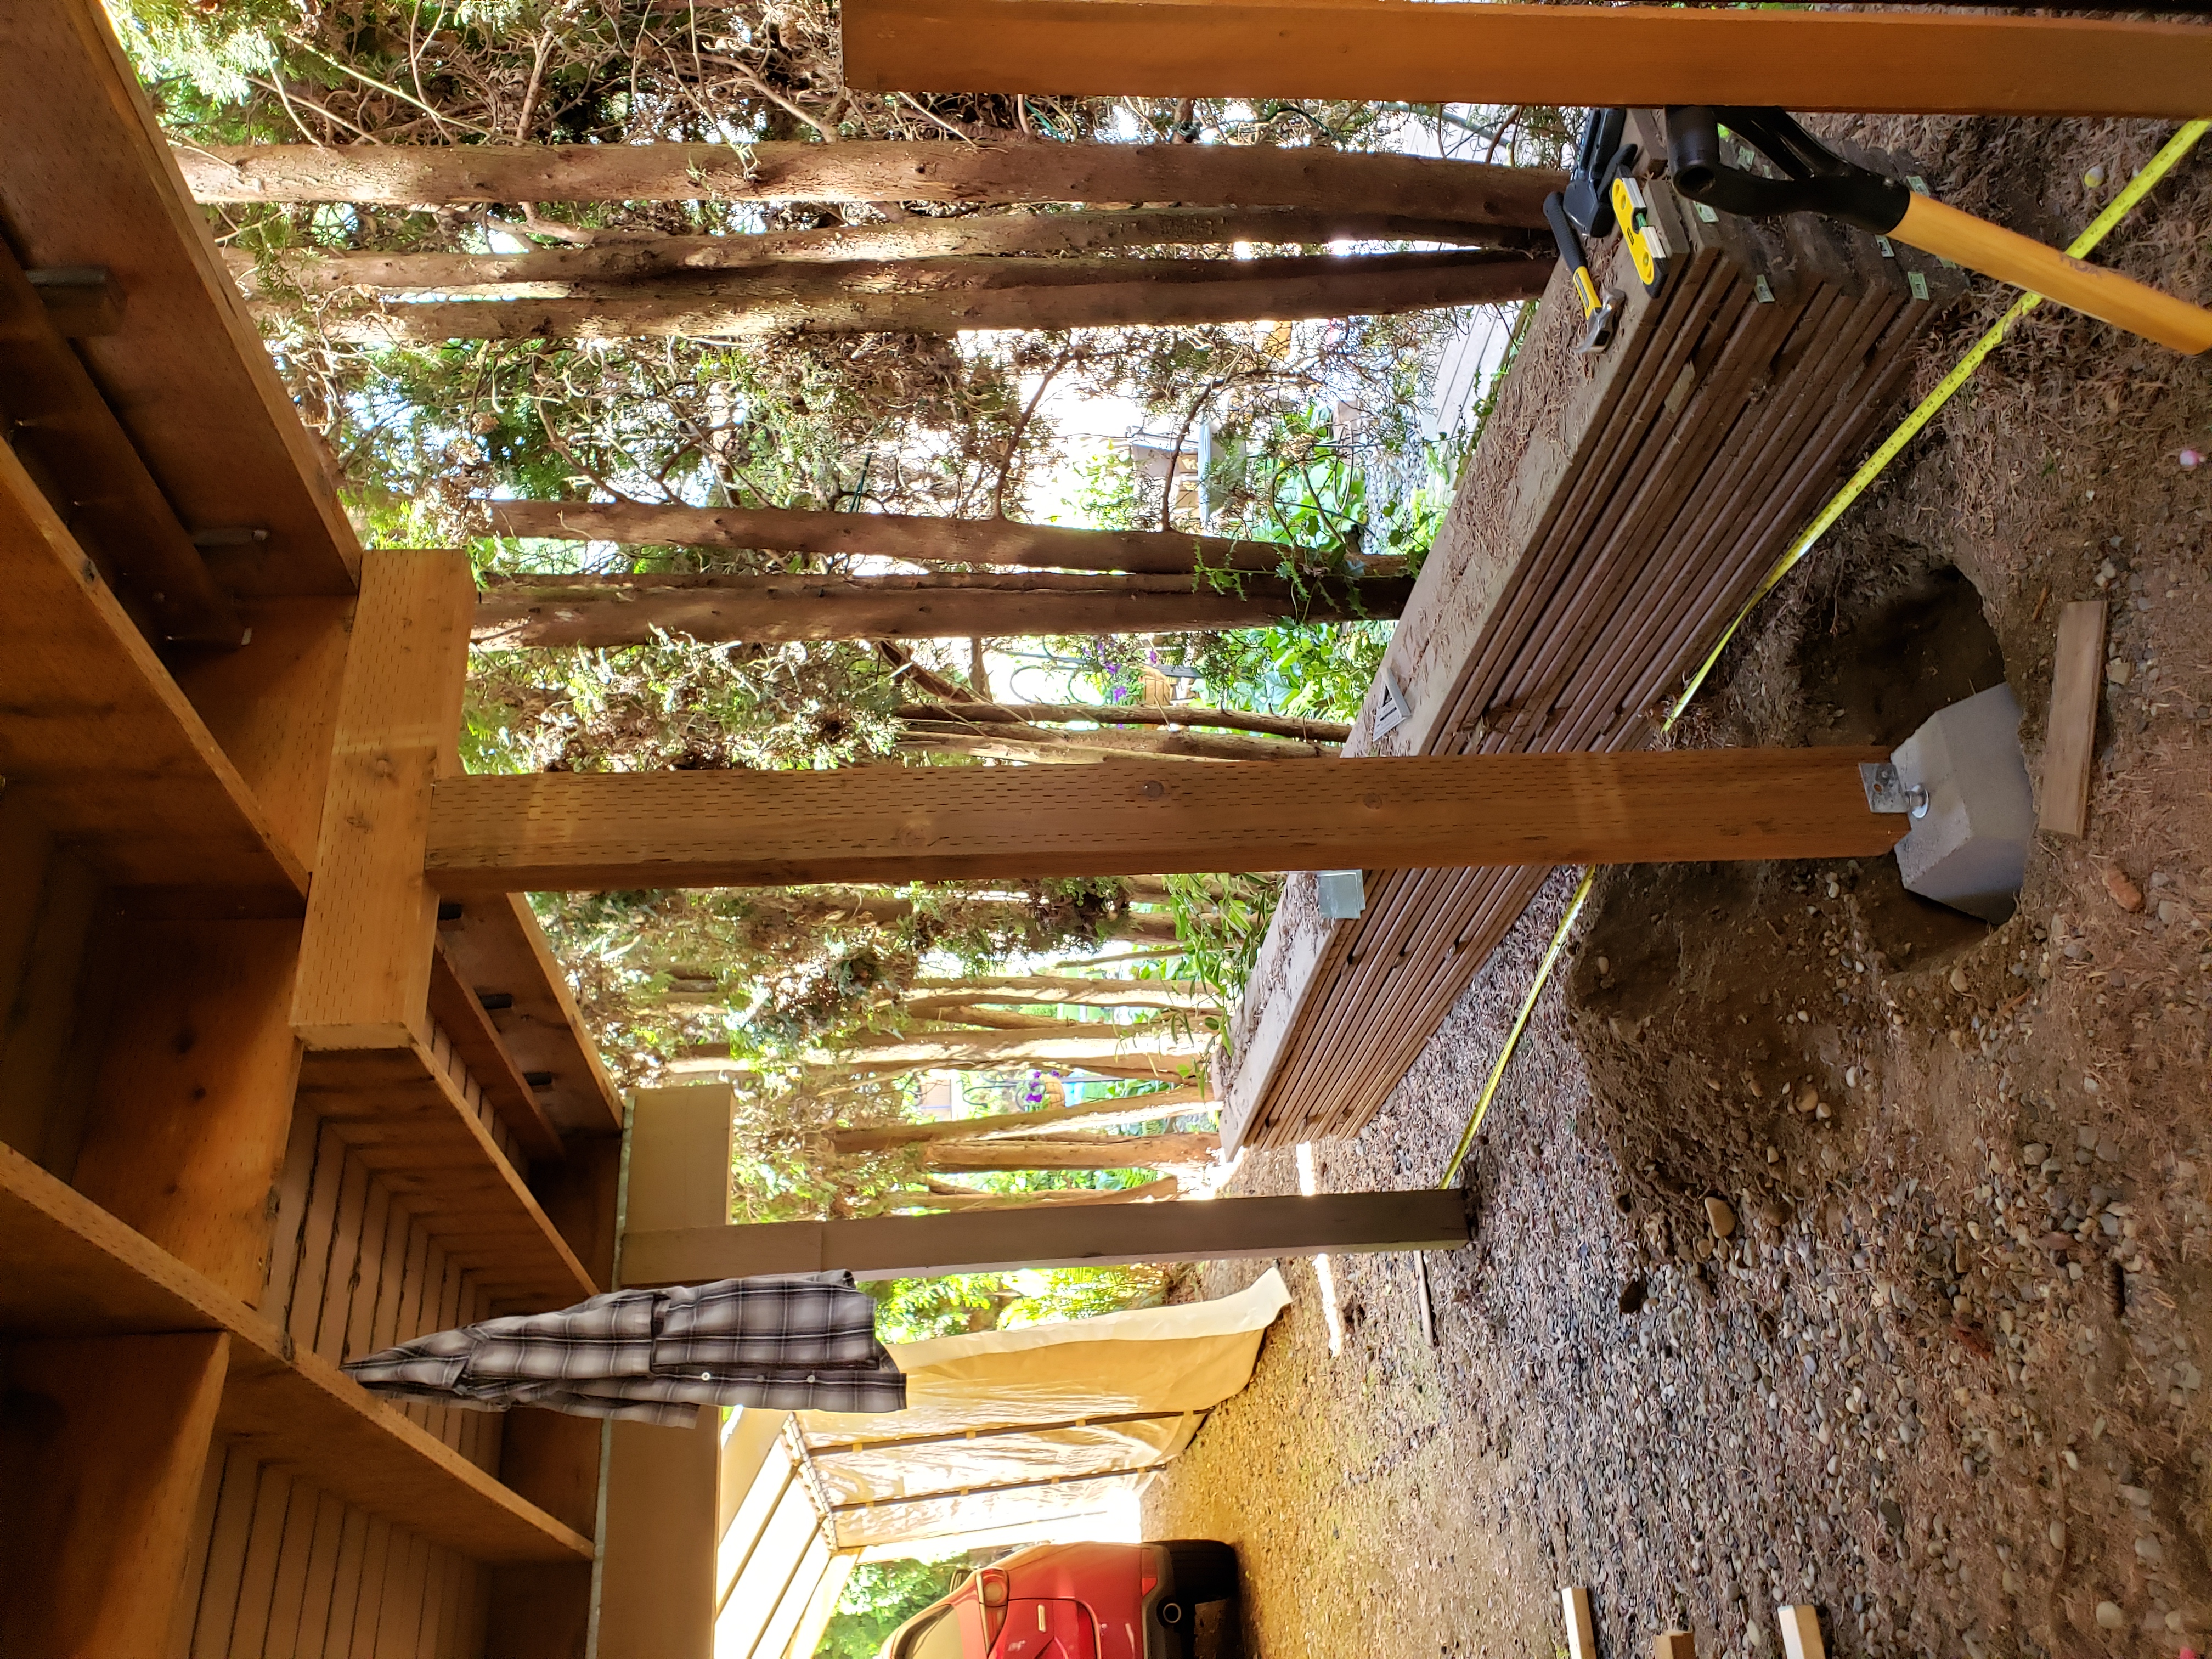
I started by measuring where the new beam should be:
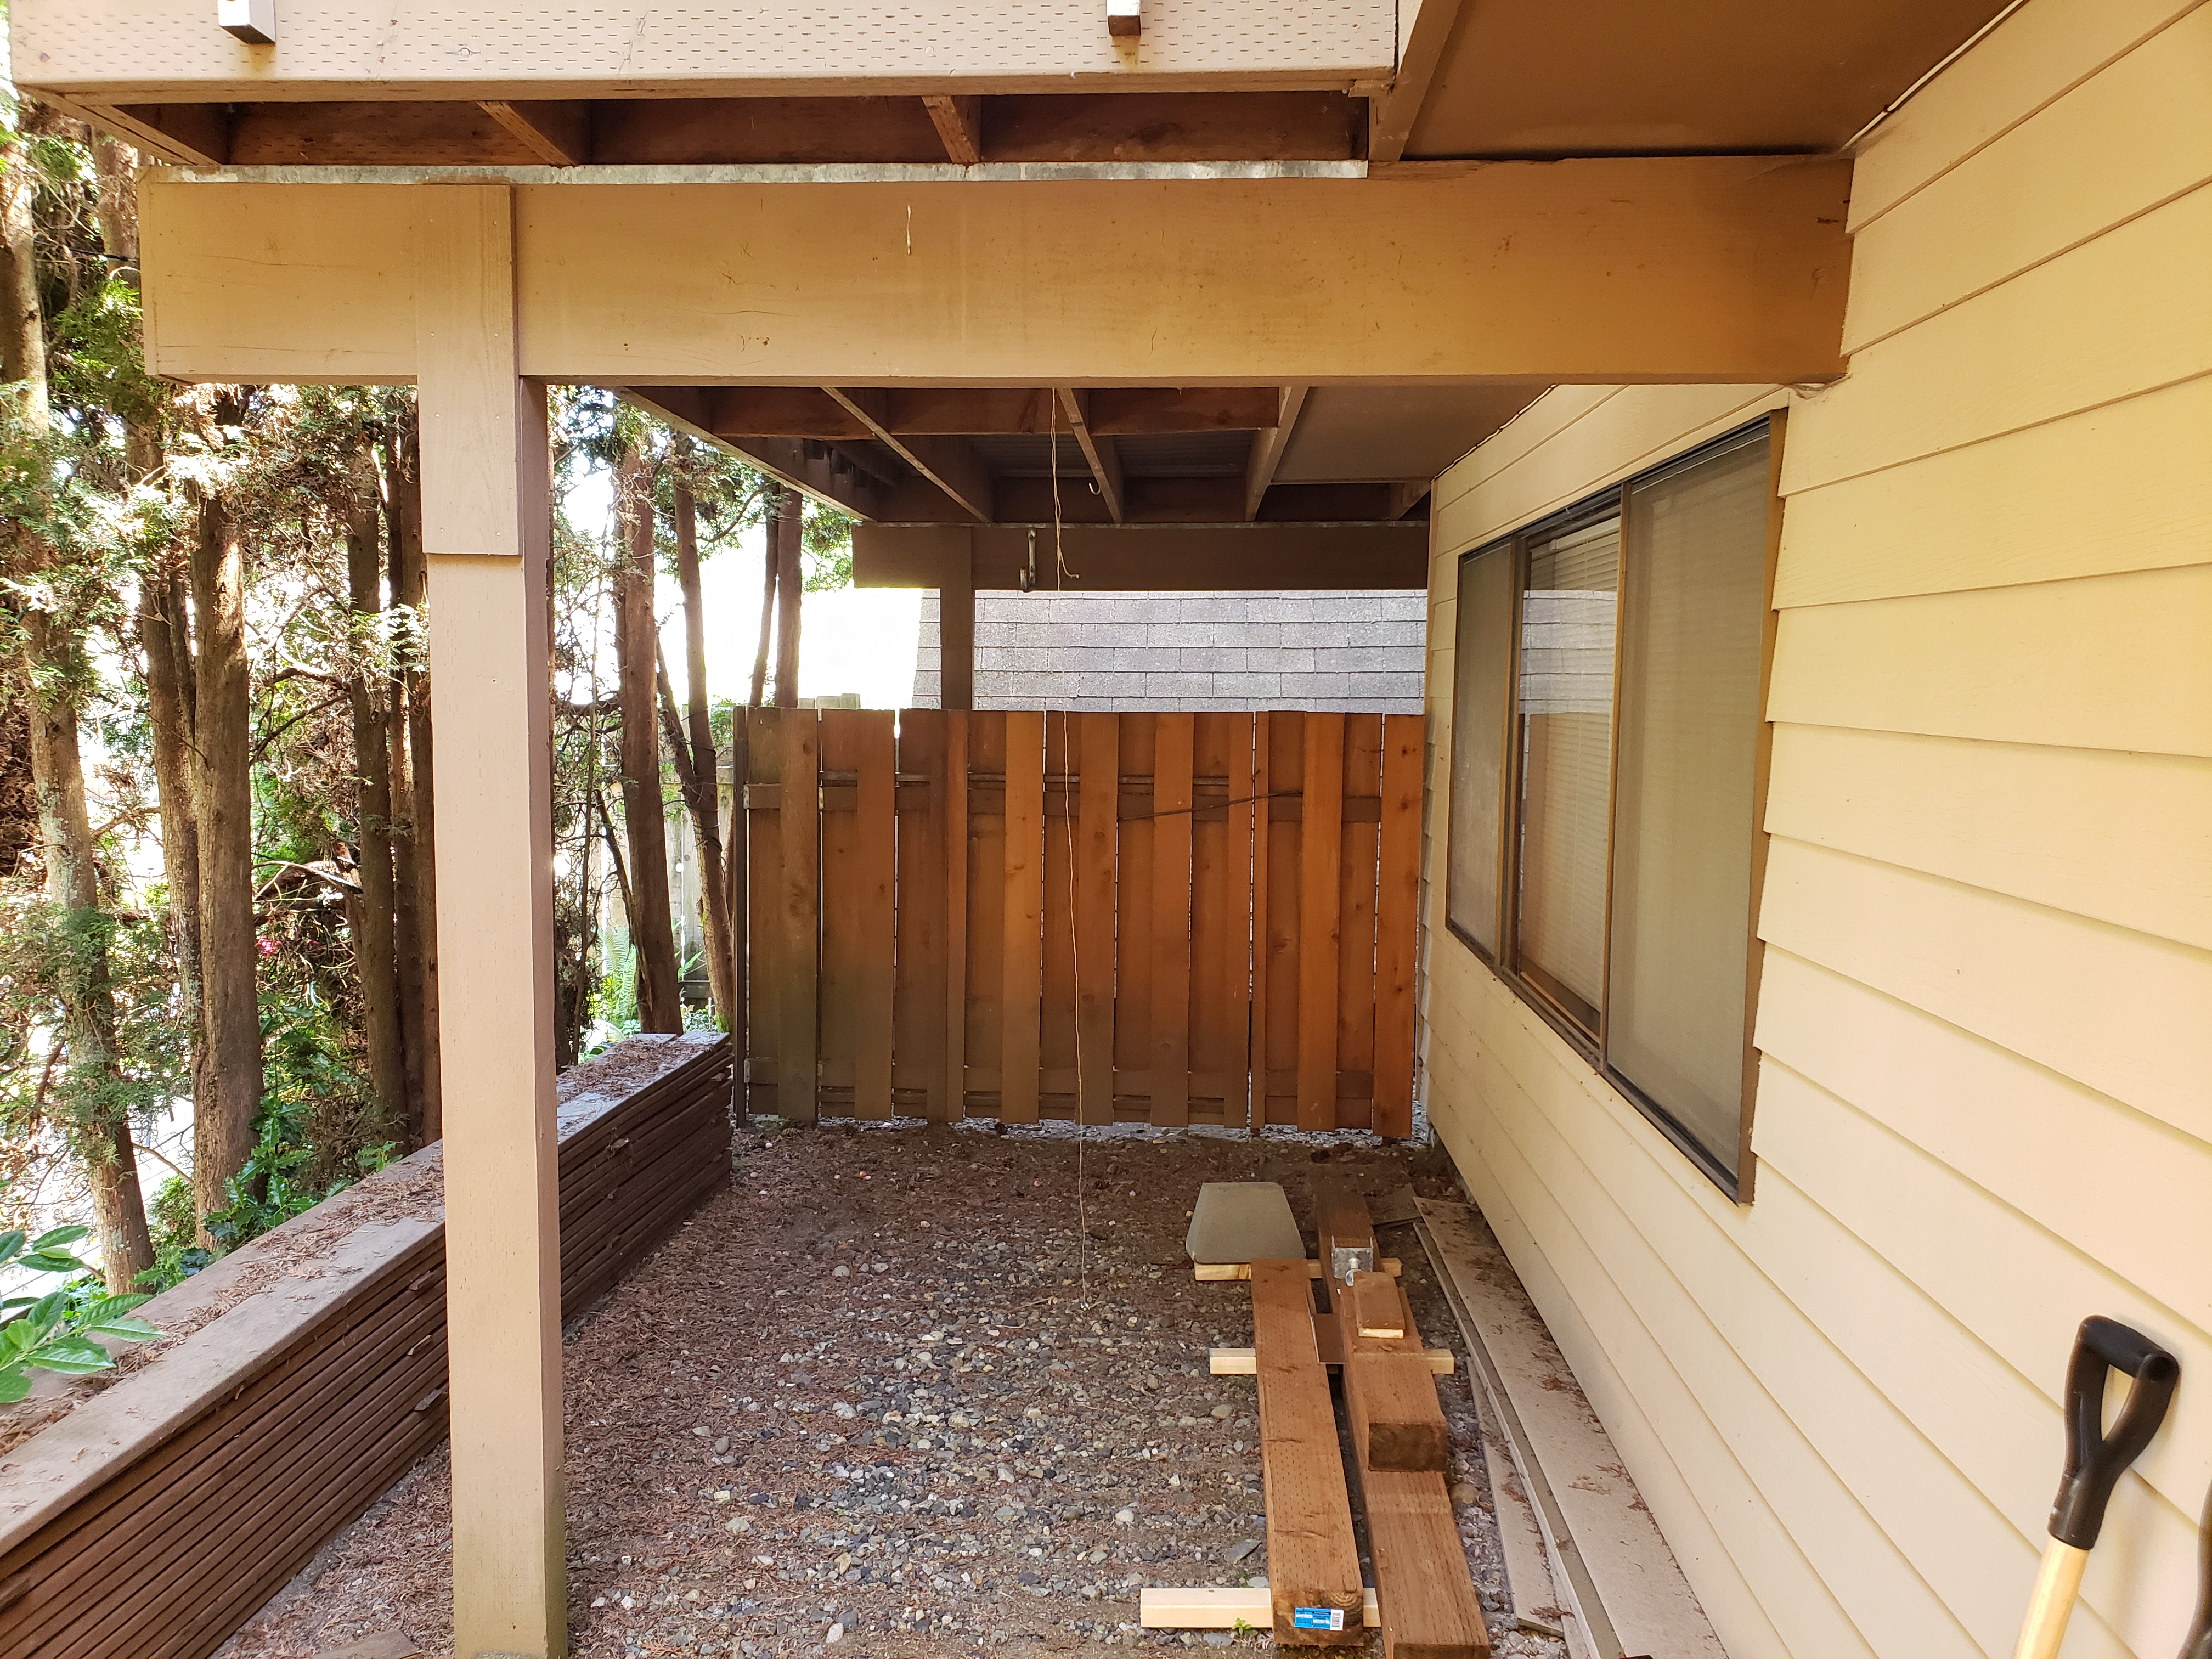
The 2 existing beams were spaced out 16 feet apart. That’s a long distance for supports, and it was the main cause of flexing of the balcony floor when walking on it.
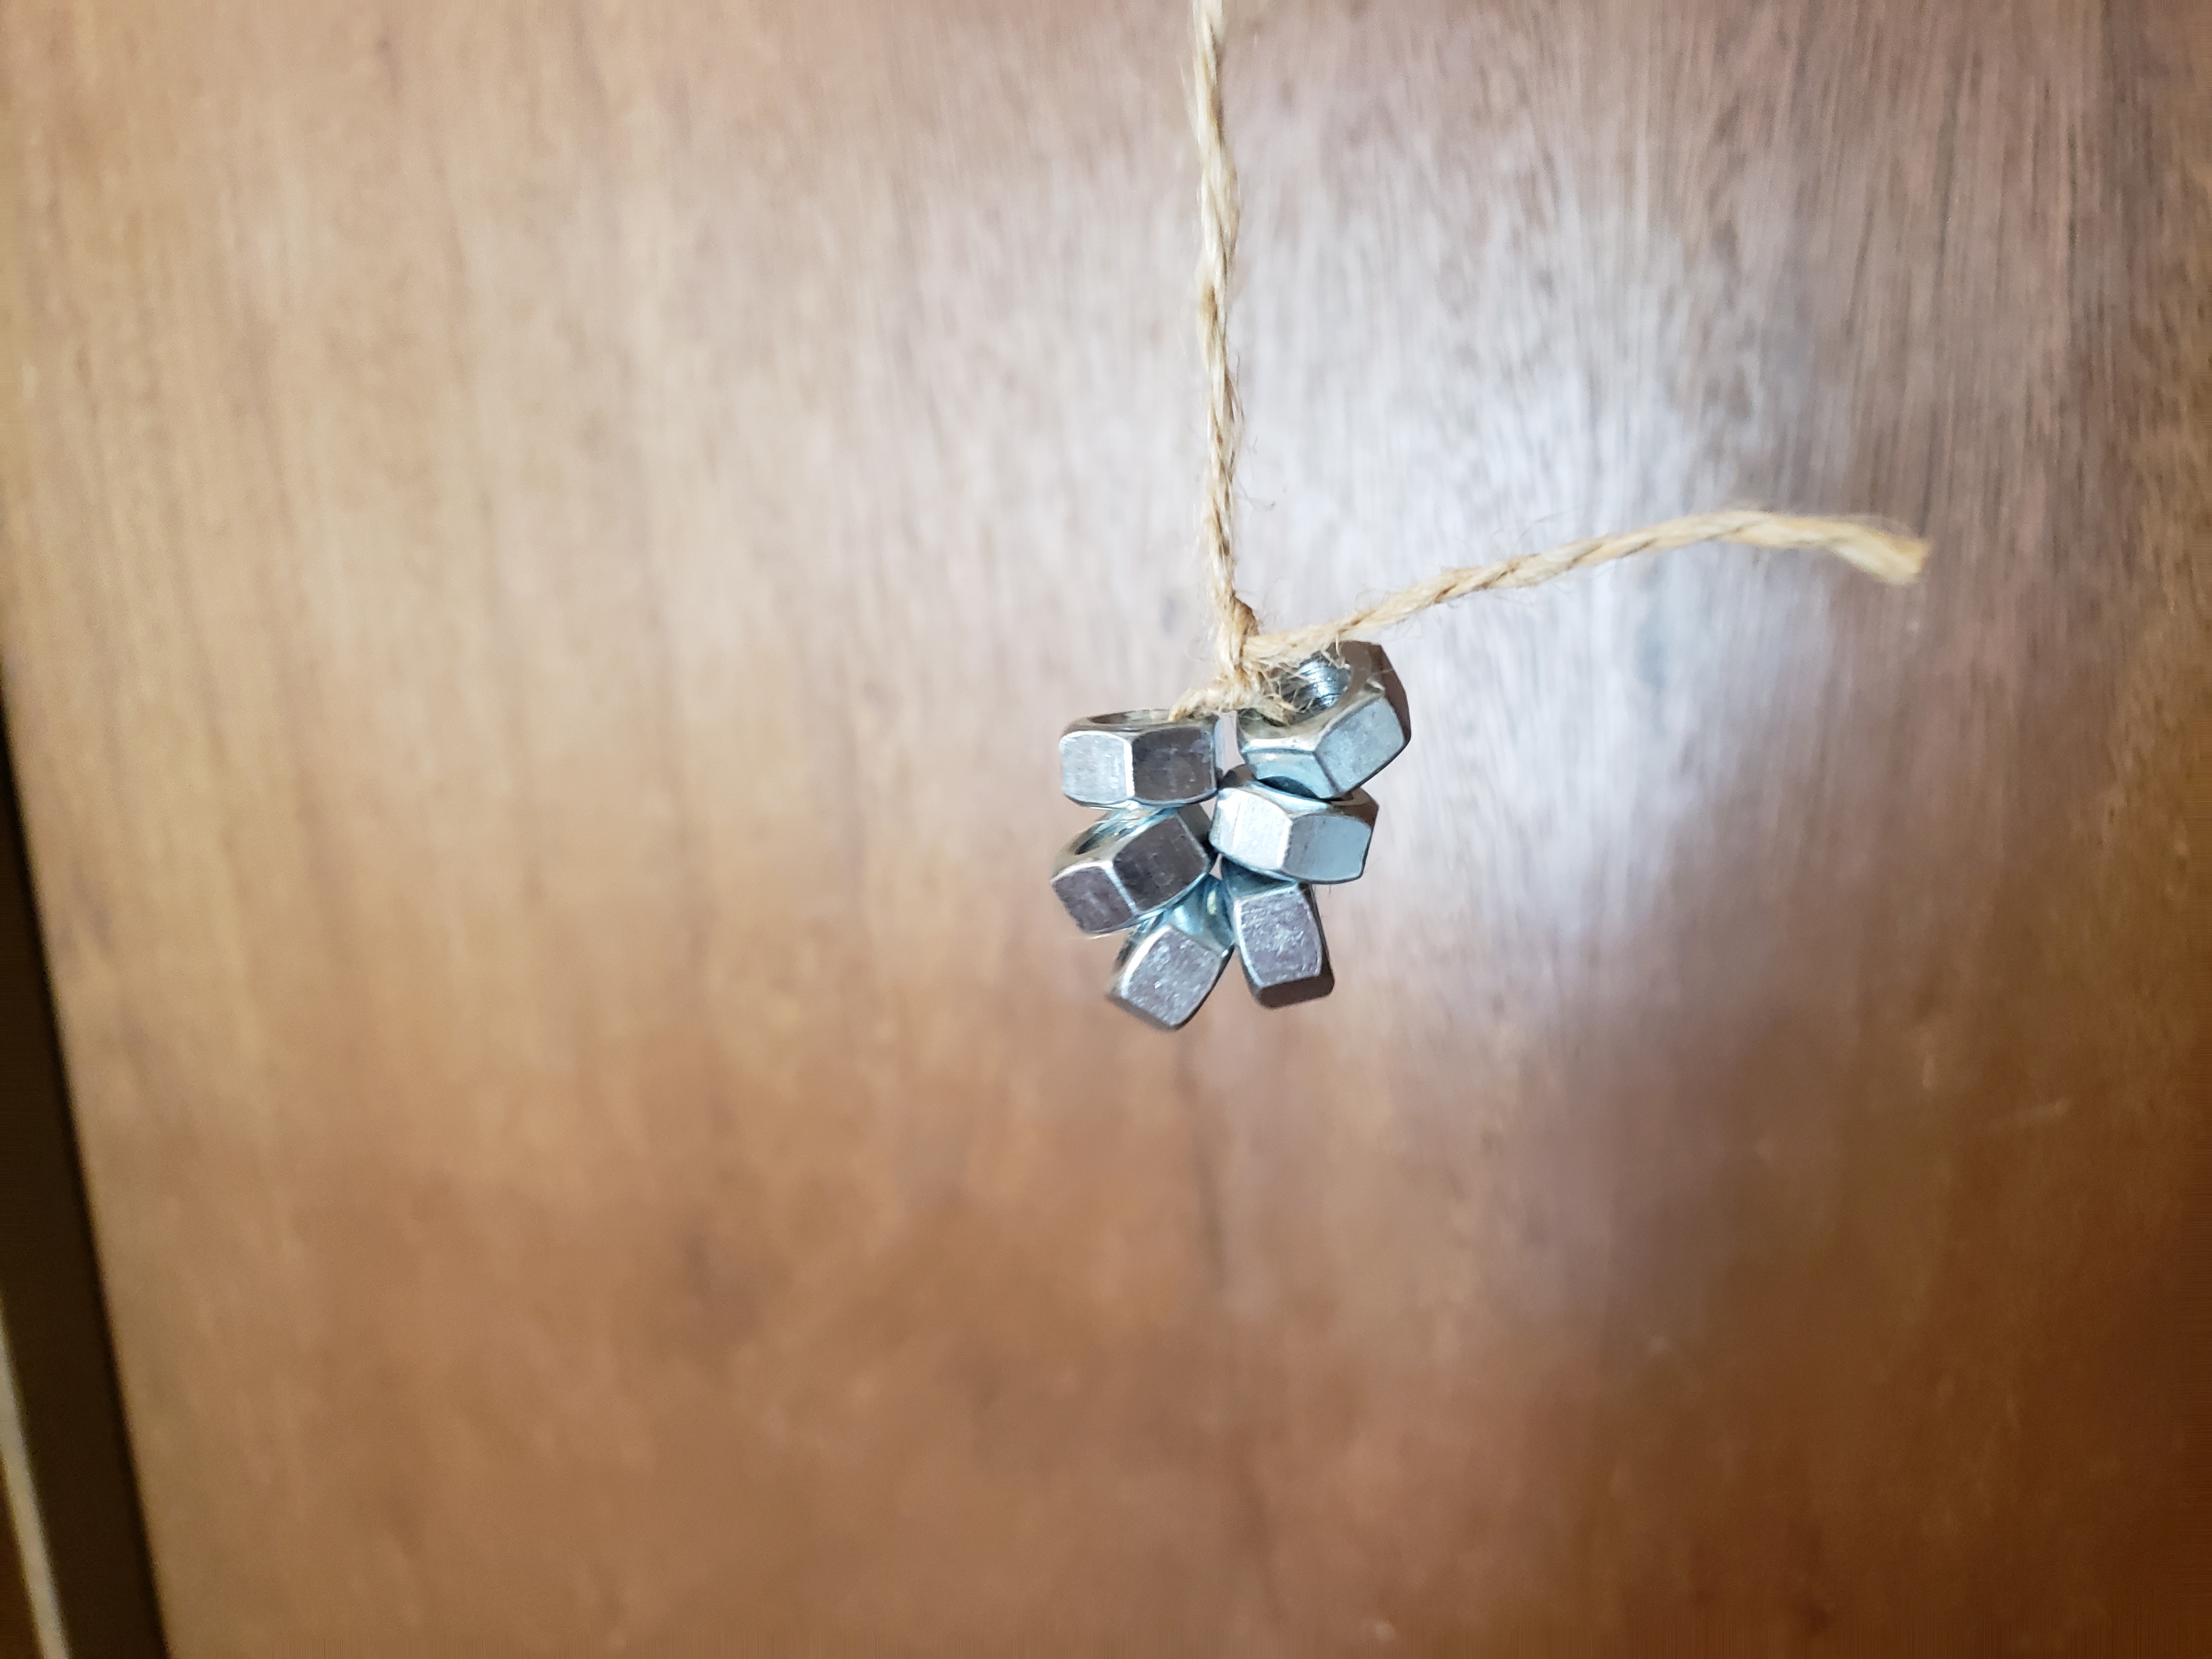
Hint: if you want to see where the beam will reach the balcony, put some weight on a string and hang it to see where it lands on the ground – I used few nuts:
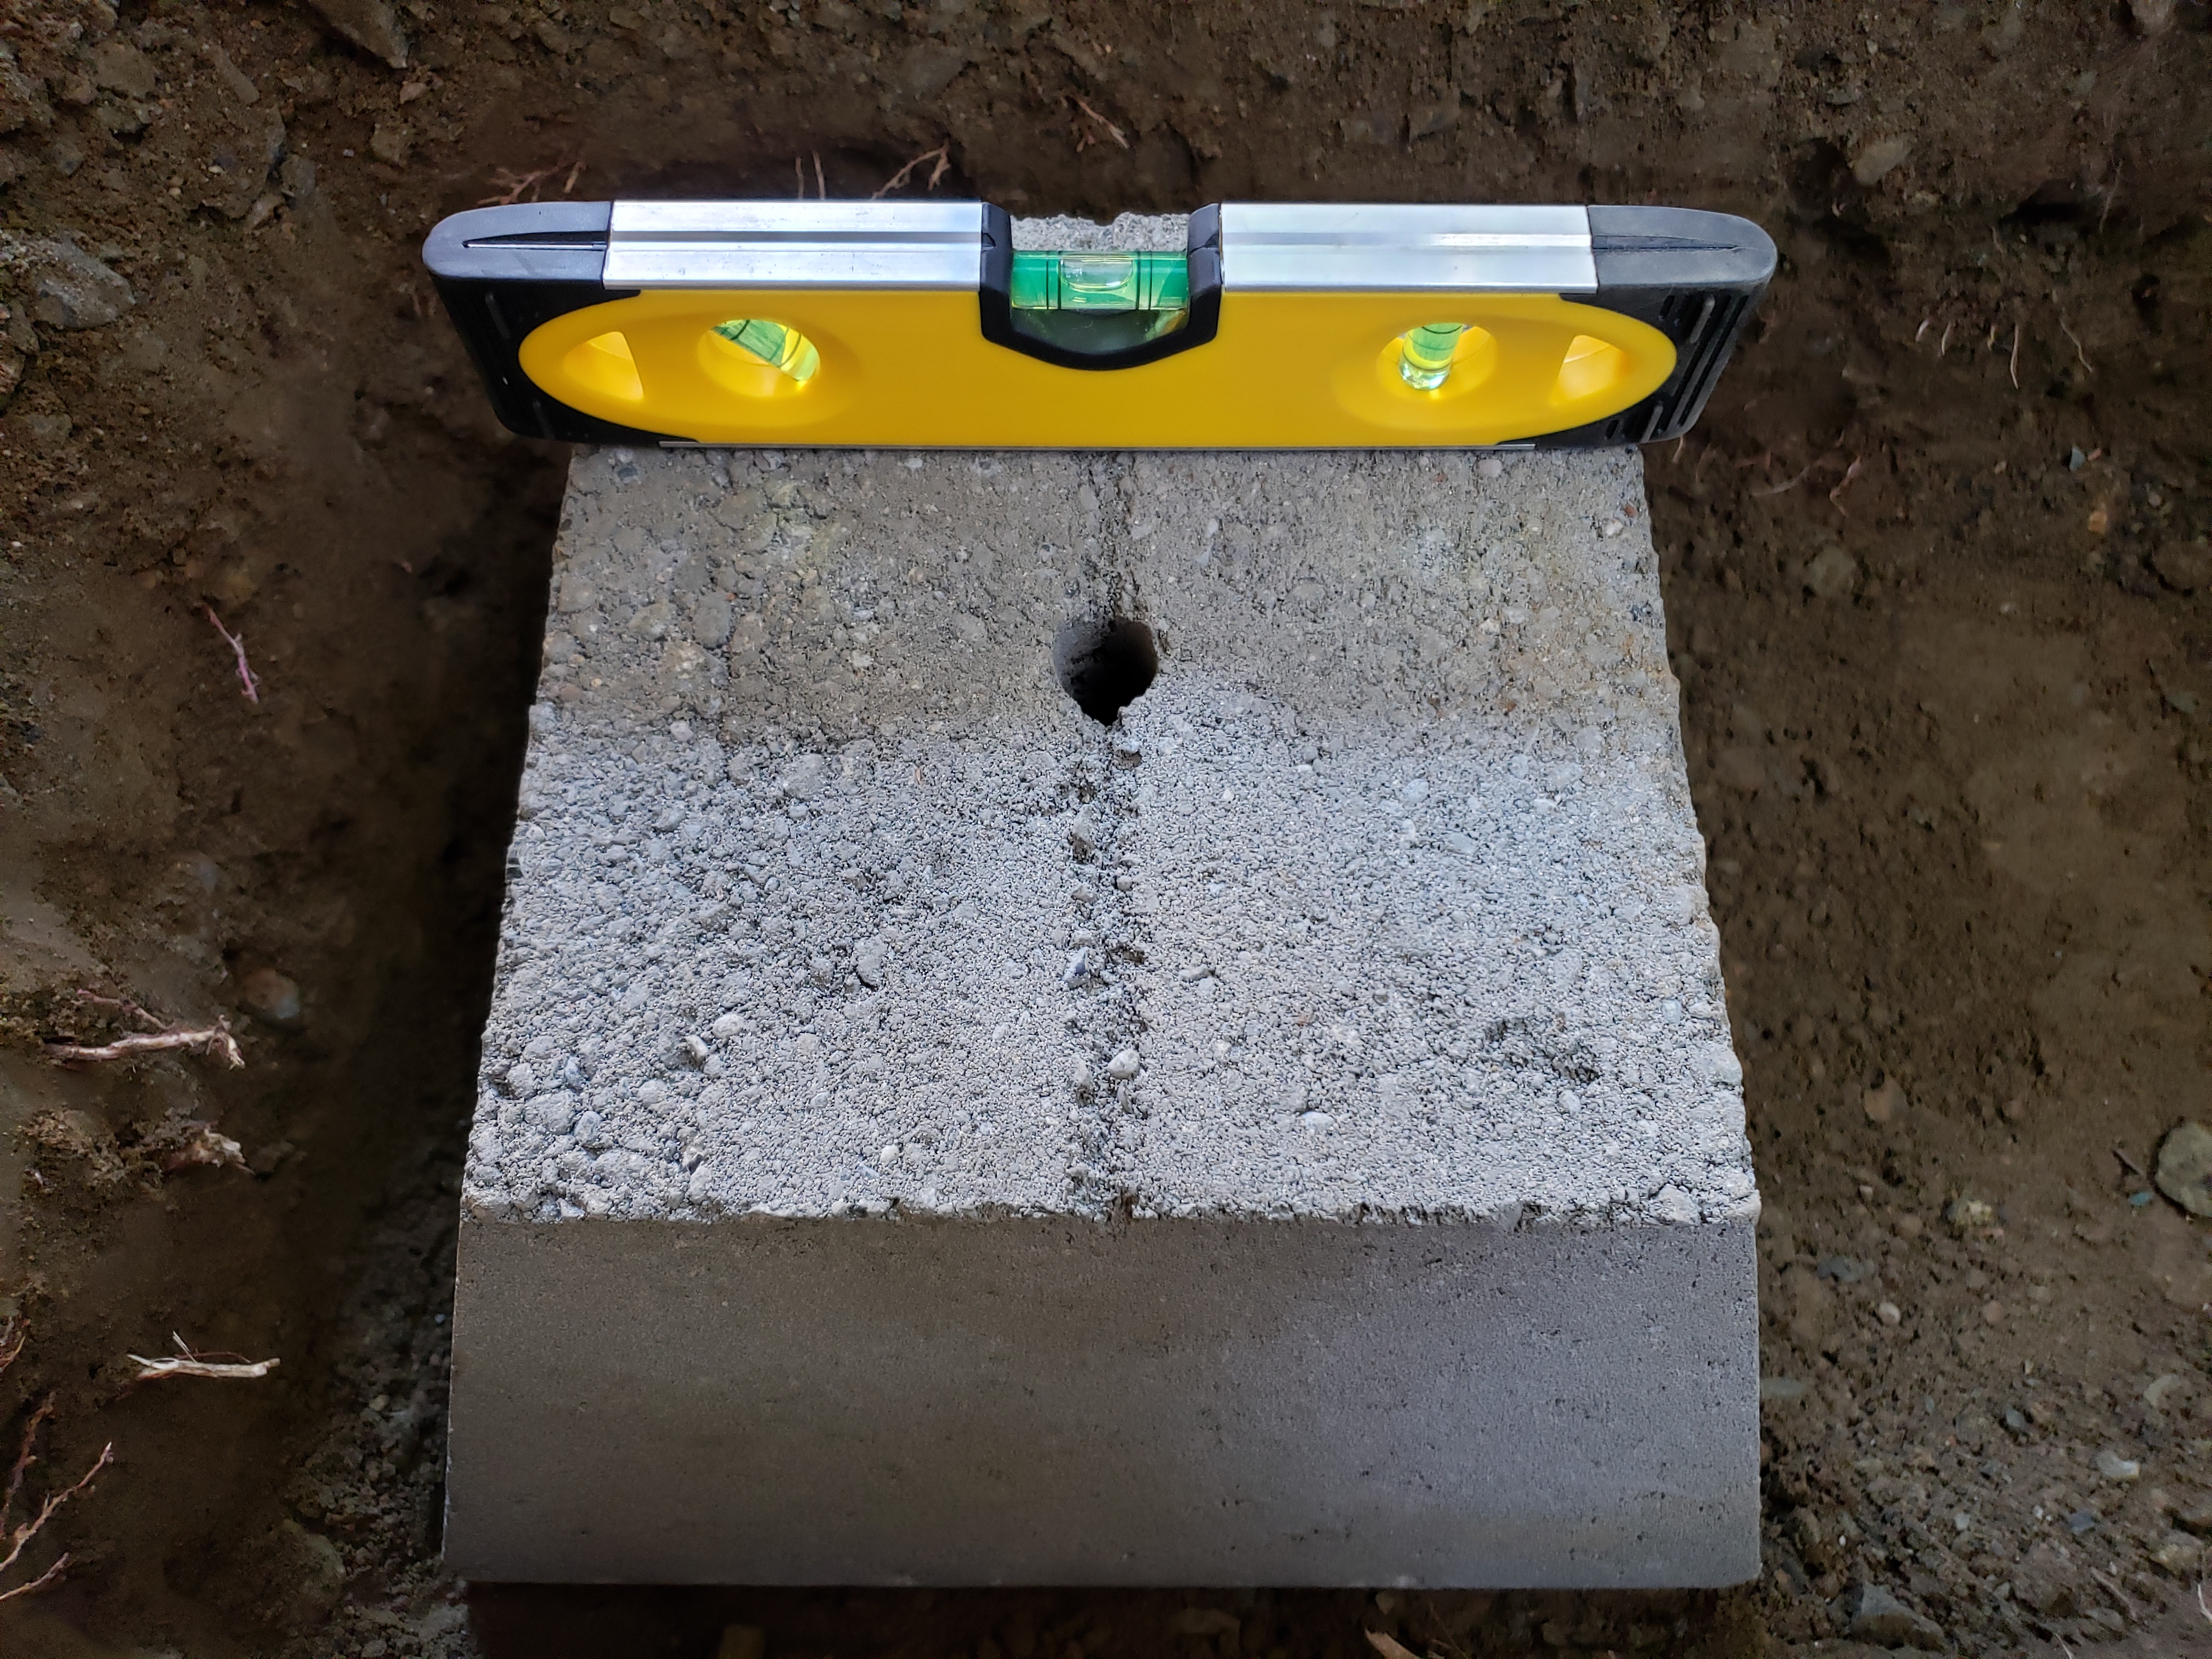
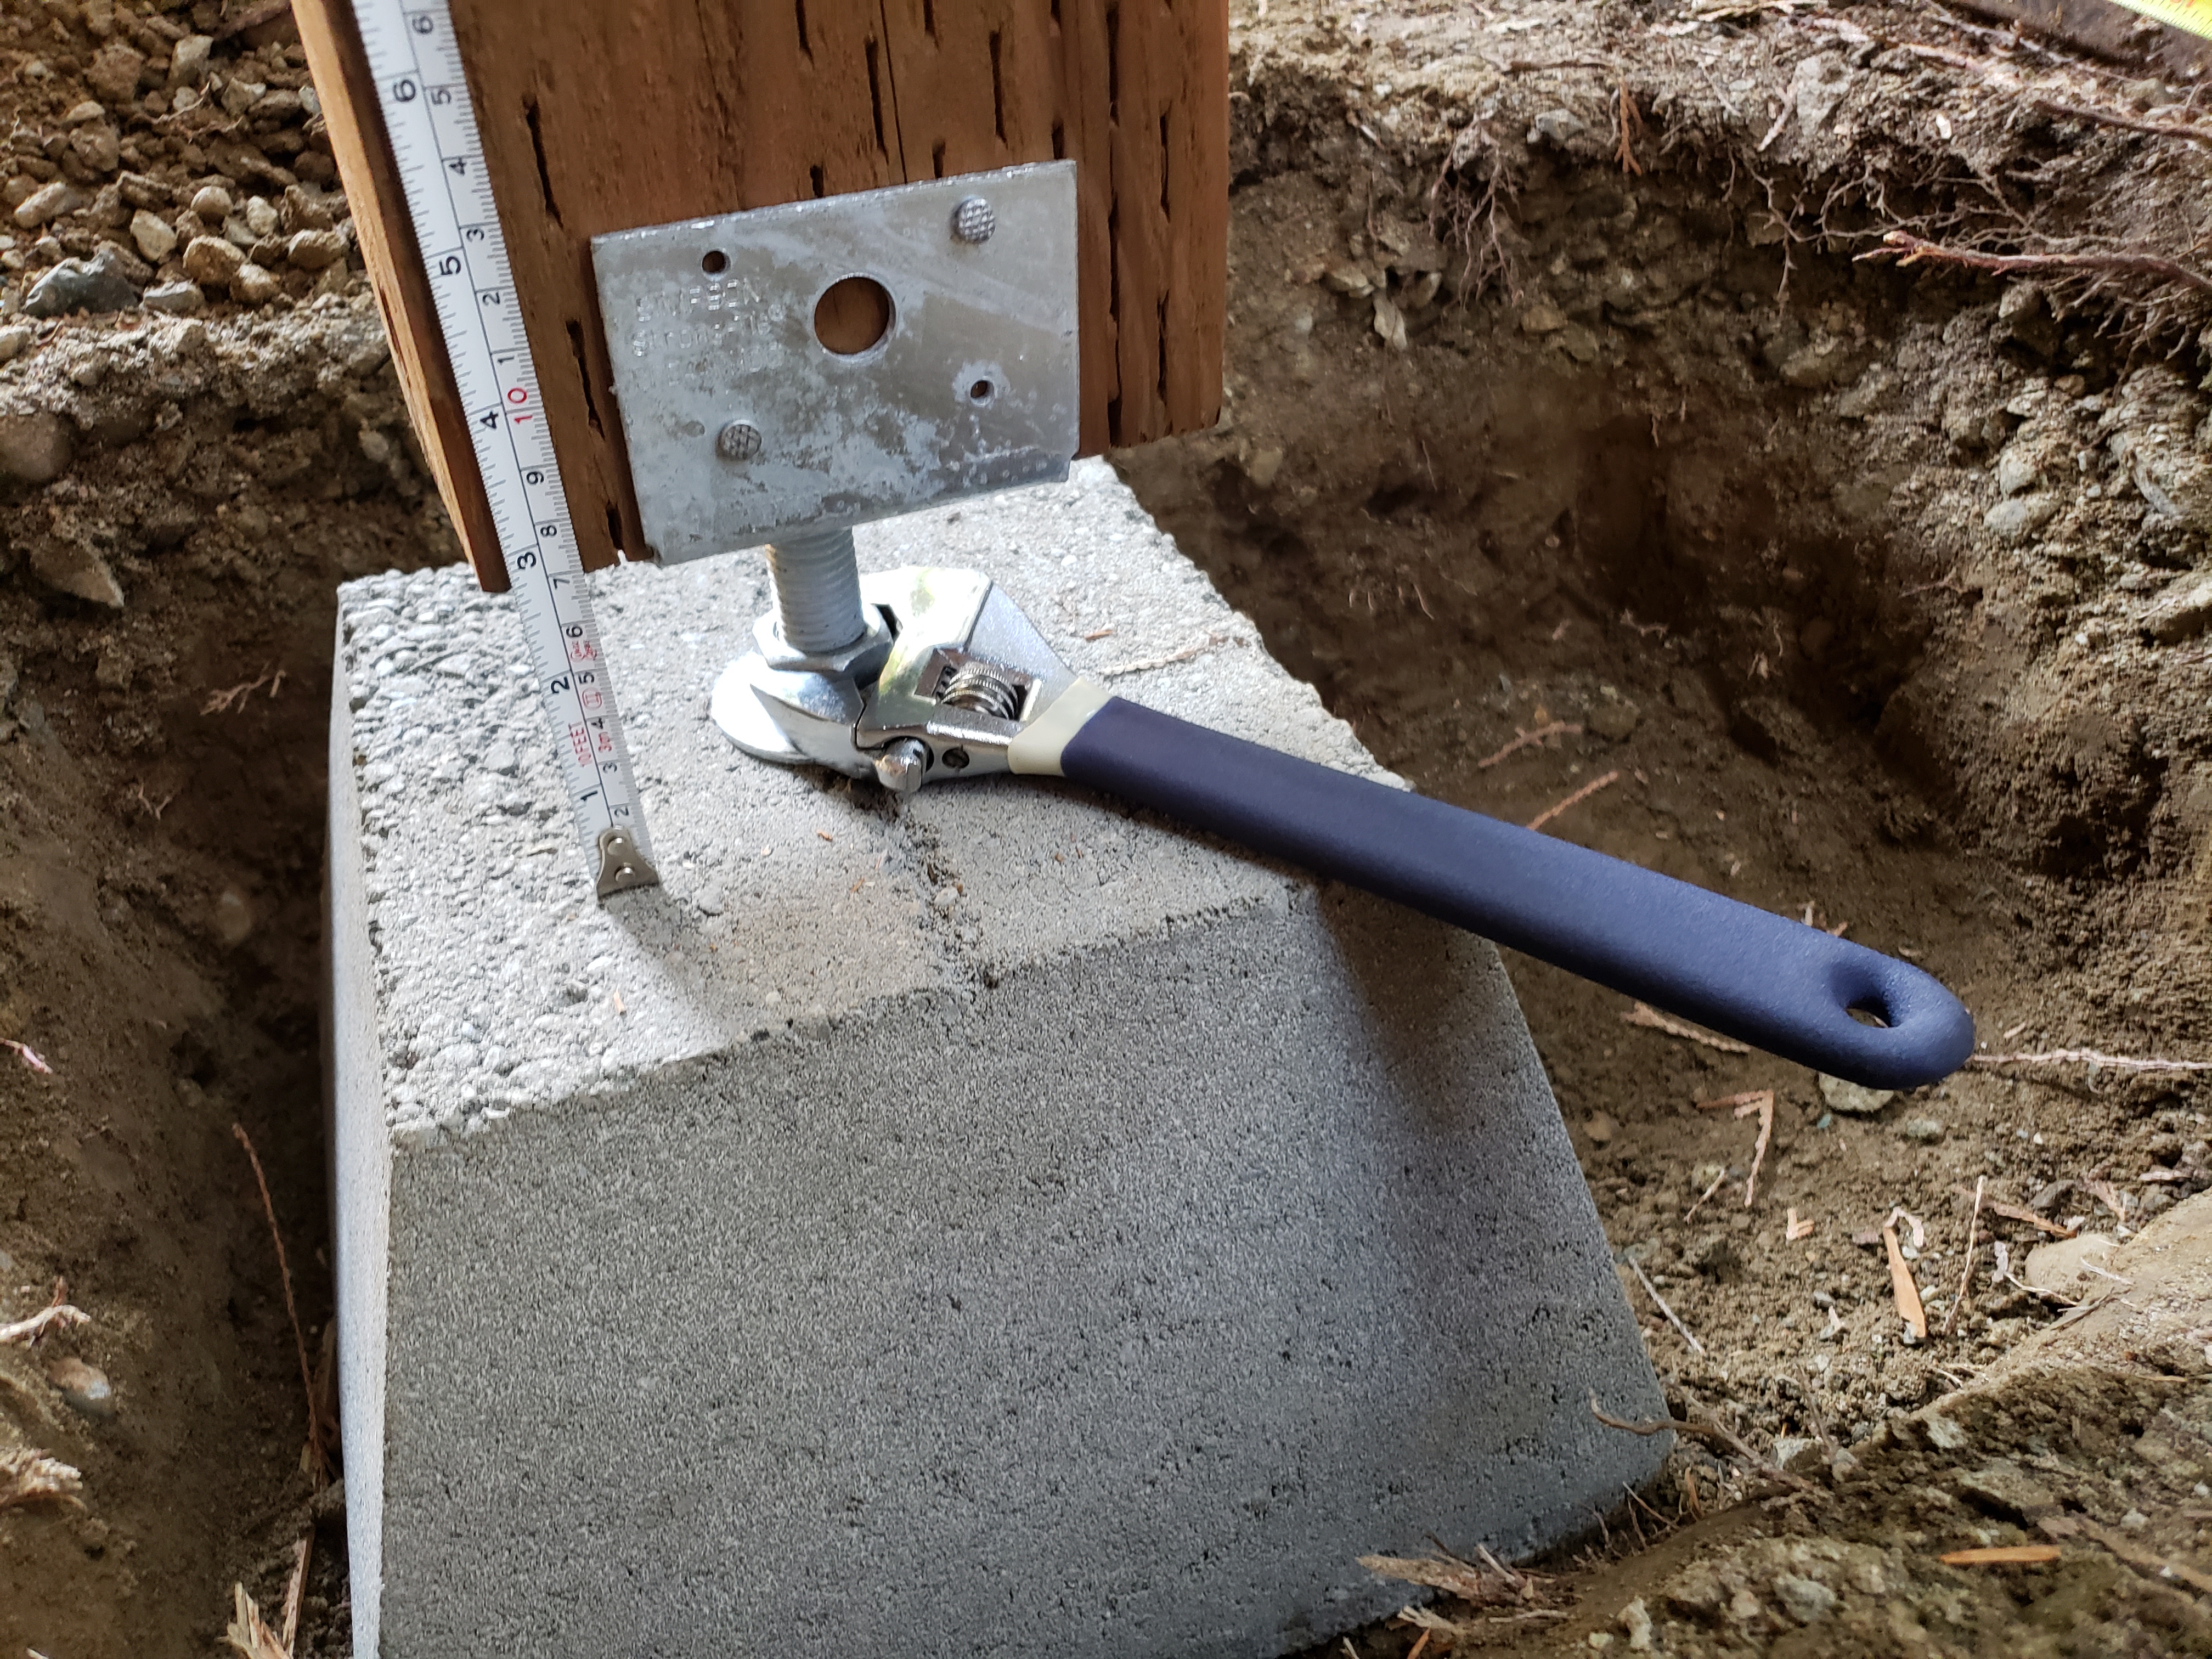
Then I proceeded to dig out the hole for concrete block. Make sure the hole is wider than the block to allow for some fine-tuning. You’ll probably have to put the block in and take it out few times, then level out the ground so it sits properly.

It’s more convenient to use those blocks, that having to mix and pour concrete and have a bolt set in it then – which means there’s a drying time to consider. By buying a ready block with an adjustable bolt, we can fine-tune the height of the support beam to make sure it takes enough slack out of the balcony and finish the installation in the same day.
It’s important, however, to make sure the block is leveled on the ground – check in 2 directions, then make adjustments if needed, until you’re happy with the result.
When screwing the bolt, I used a piece of scrap wood for extra lever:

You could just push it in (there isn’t really a thread in the concrete block) but I didn’t want to chip anything, so I took the time to screw it in. It went easily.
Next was the main piece – support beam. I had to trim it first, and my table saw blade wasn’t large enough to do a single, clean pass, so I spent some time cutting from each side. It was tricky, and not sure completely safely, so be careful if you’re in the same situation.
I actually had the short piece (top of the “T” shape consisting of those beams visible on photo below) cut to size at store, since I knew how long it’s supposed to be, but with the main support beam I wanted to see how it sits on the block first.
It looks good, even though it’s just held in place thanks to being squeezed by the balcony, so it was time to make the connections permanent – I used 1×4 and few nails. I should’ve gotten 1×6 to match the width, but I had treated 1×4 at hand so I settled for it.
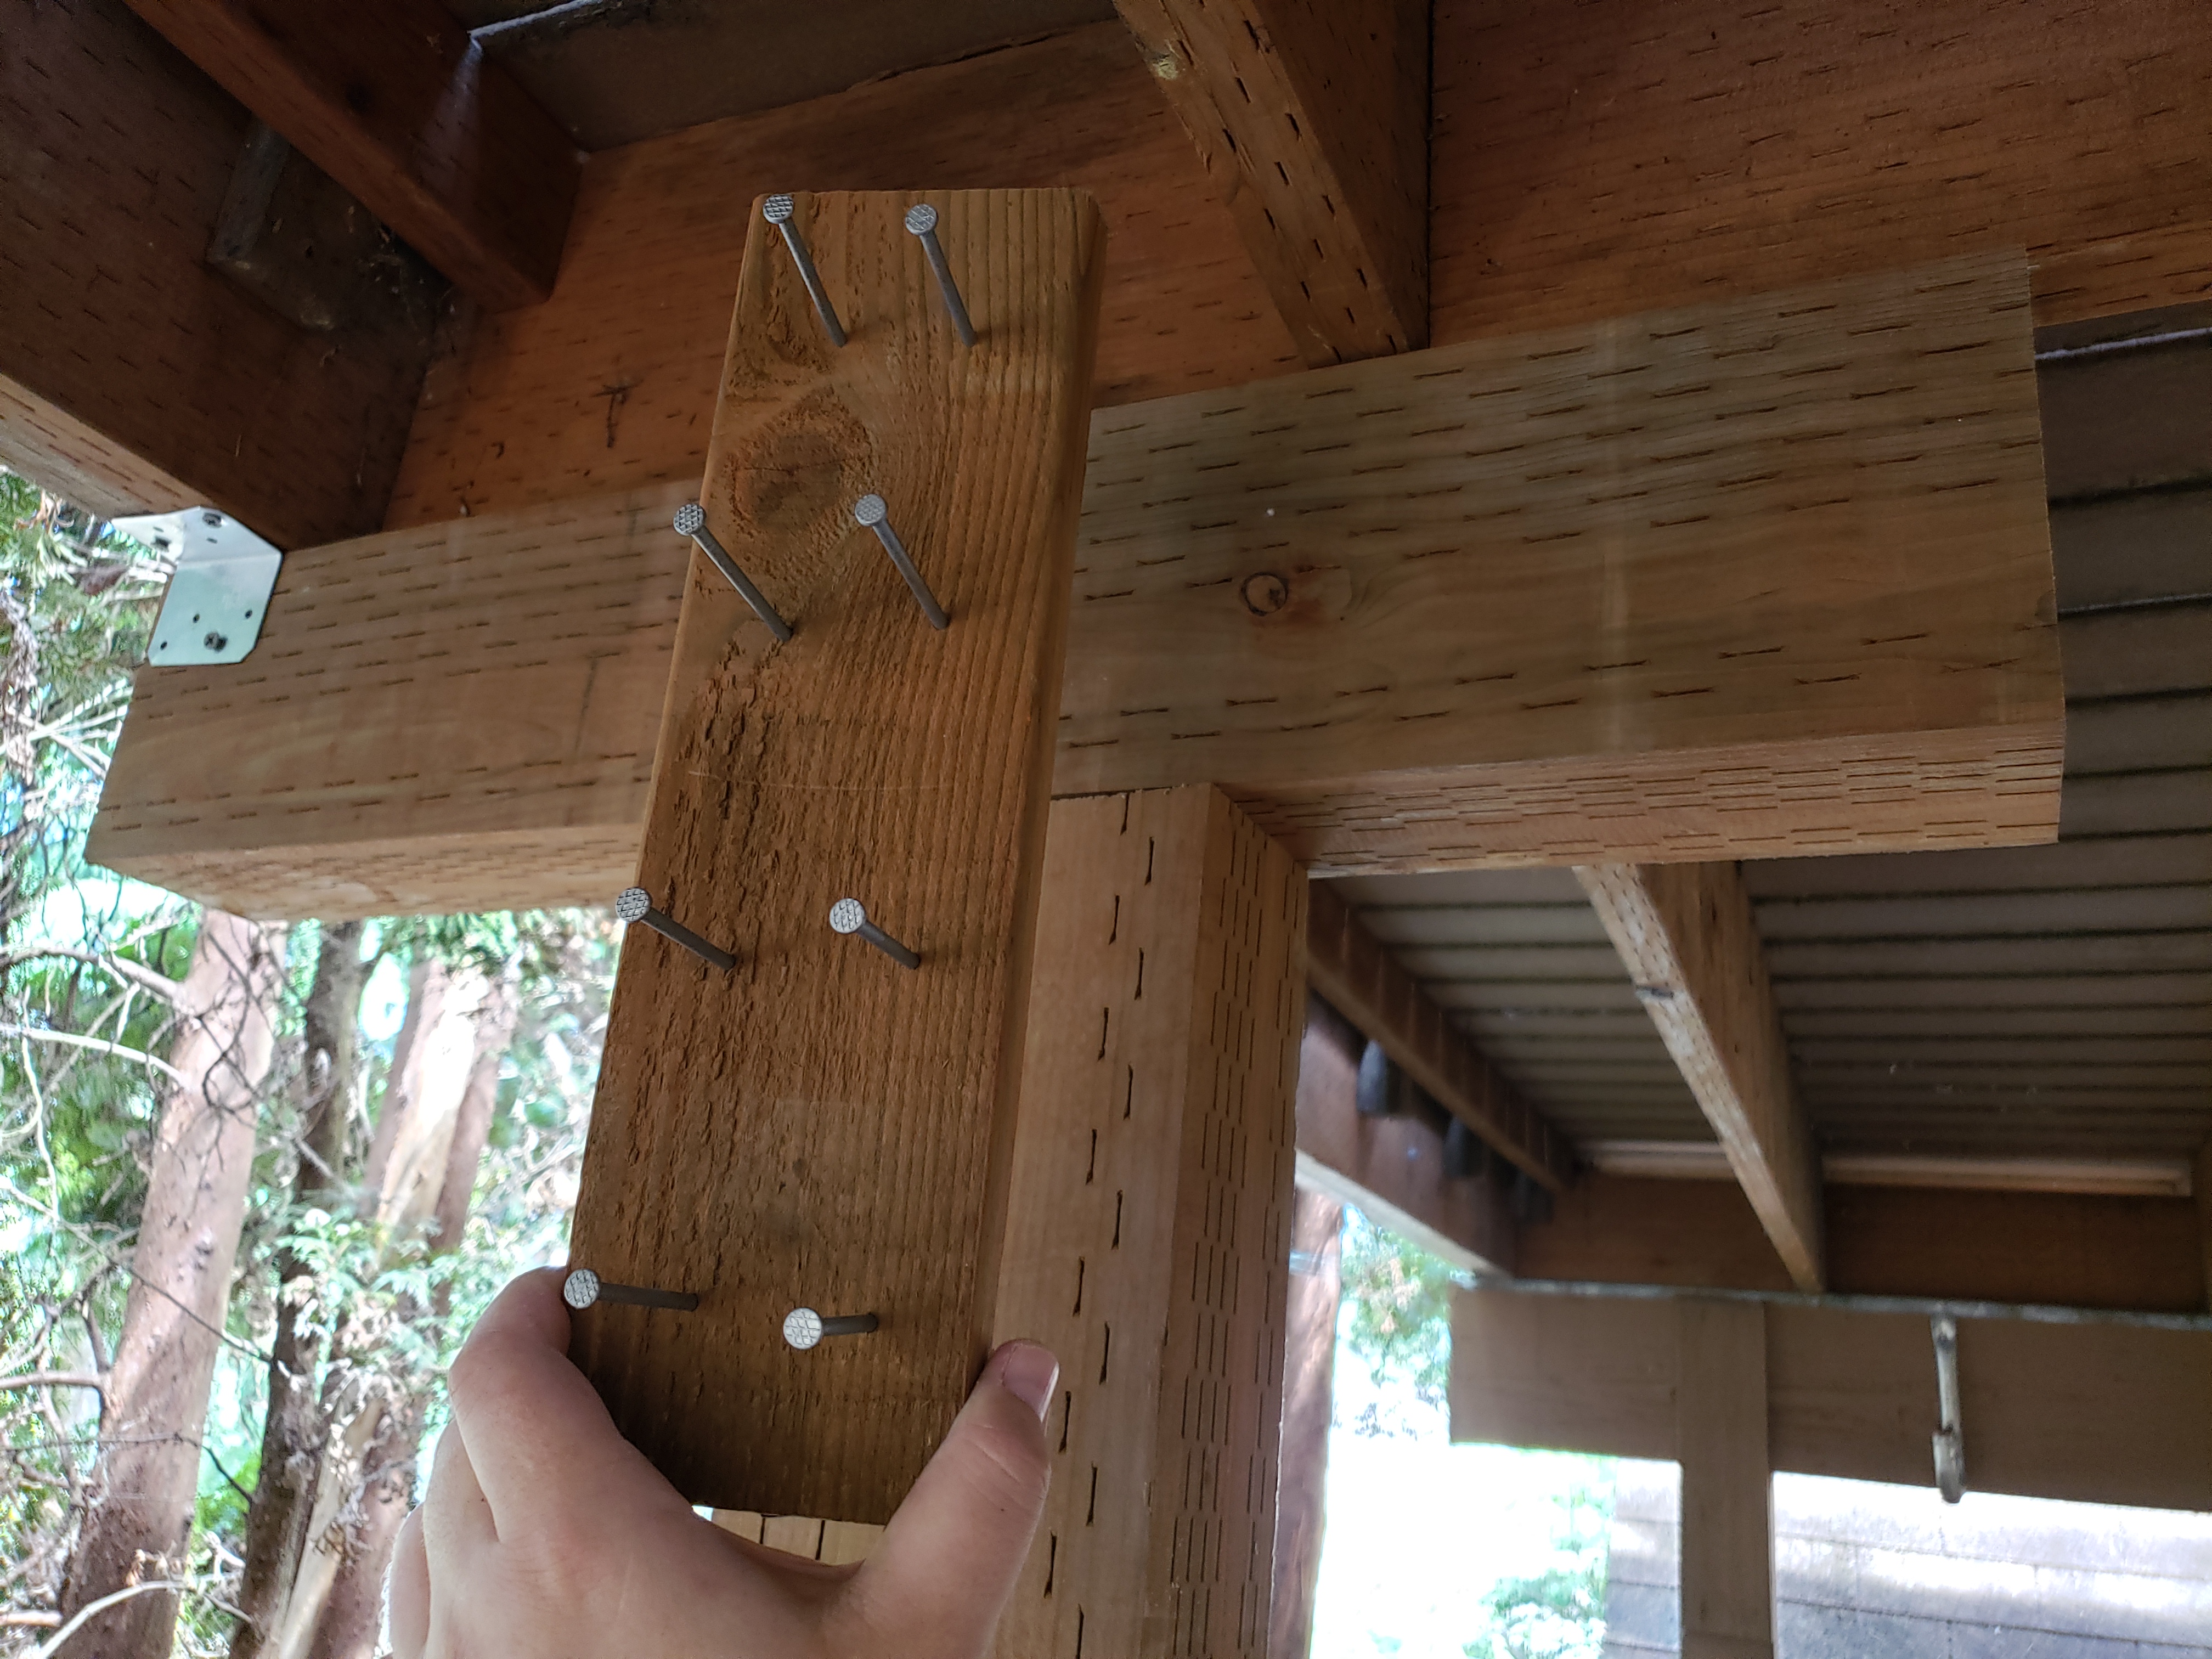
After nailing the beams together, I used strong ties from Simpson to attach top beam to the crossbeams of the balcony, for added support, and to make sure they won’t shift (pictured at the end of the top “T” beam, left side of picture above).
As I mentioned before, the use of ready block with a bolt is a huge benefit. You can shorten the distance from the block by screwing in one direction, to be able to easily fit the support beam on top, and then adjust the height as needed.
Last step was putting the dirt back in the hole, leveling the ground around and that’s it!
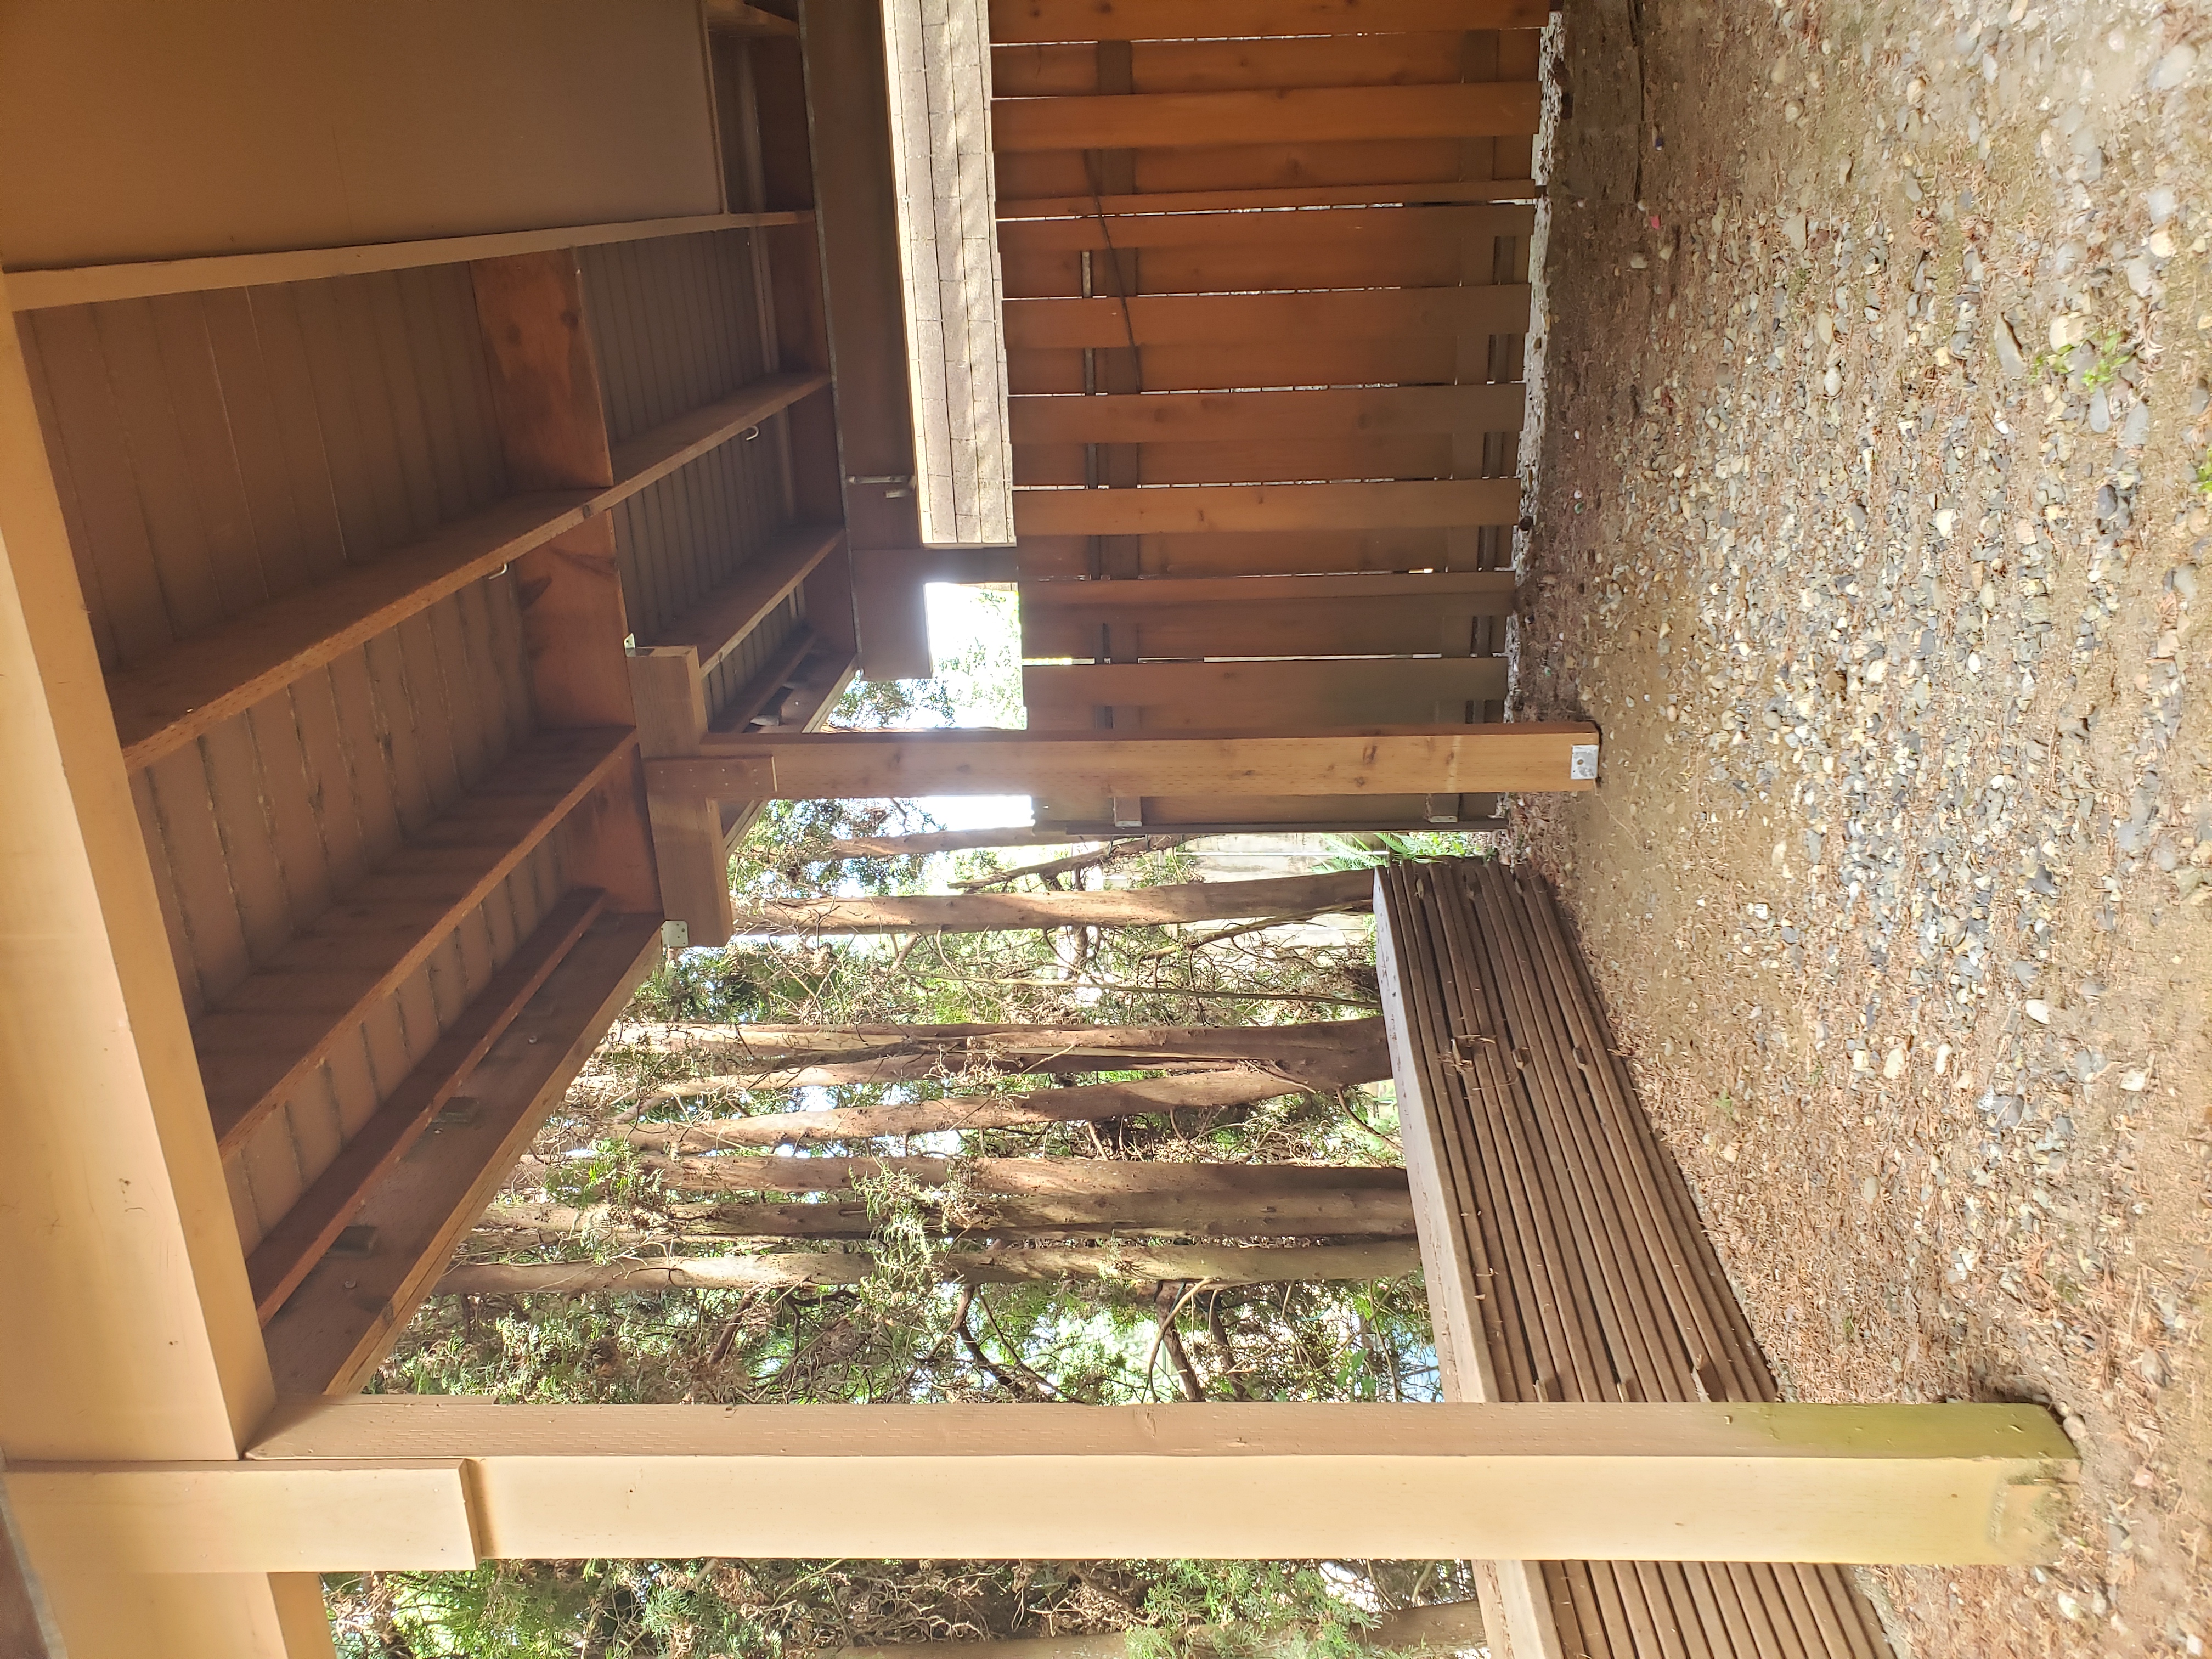
That was a quick, less than 2 hour long job. And the results were immediate – walking on the balcony now feels how it should’ve from beginning. No flexing, no feeling like we’re walking on unstable surface. Easy way to increase both the comfort and safety!
I still have to paint it to match the color of other beams, but that’s as simple as it gets and doesn’t really make for an interesting read… 😉
Have you seen yet what did I build on top of that balcony?
Check it out here!
Thanks for visiting! I hope you found it informative. Let me know if have any questions or feedback, leave a comment and I’ll get back to you.